Van Conversion #8 – The Bathroom

Pé na estrada! (3)

The bathroom was one of the more complicated parts to do, because it requires a base and a waterprooft space, something that with the wheel cavity in the middle was not very easy to get … but we talk about it later, for now let’s talk about why we chose to have a bathroom in the van.

Bathroom, yes or no?

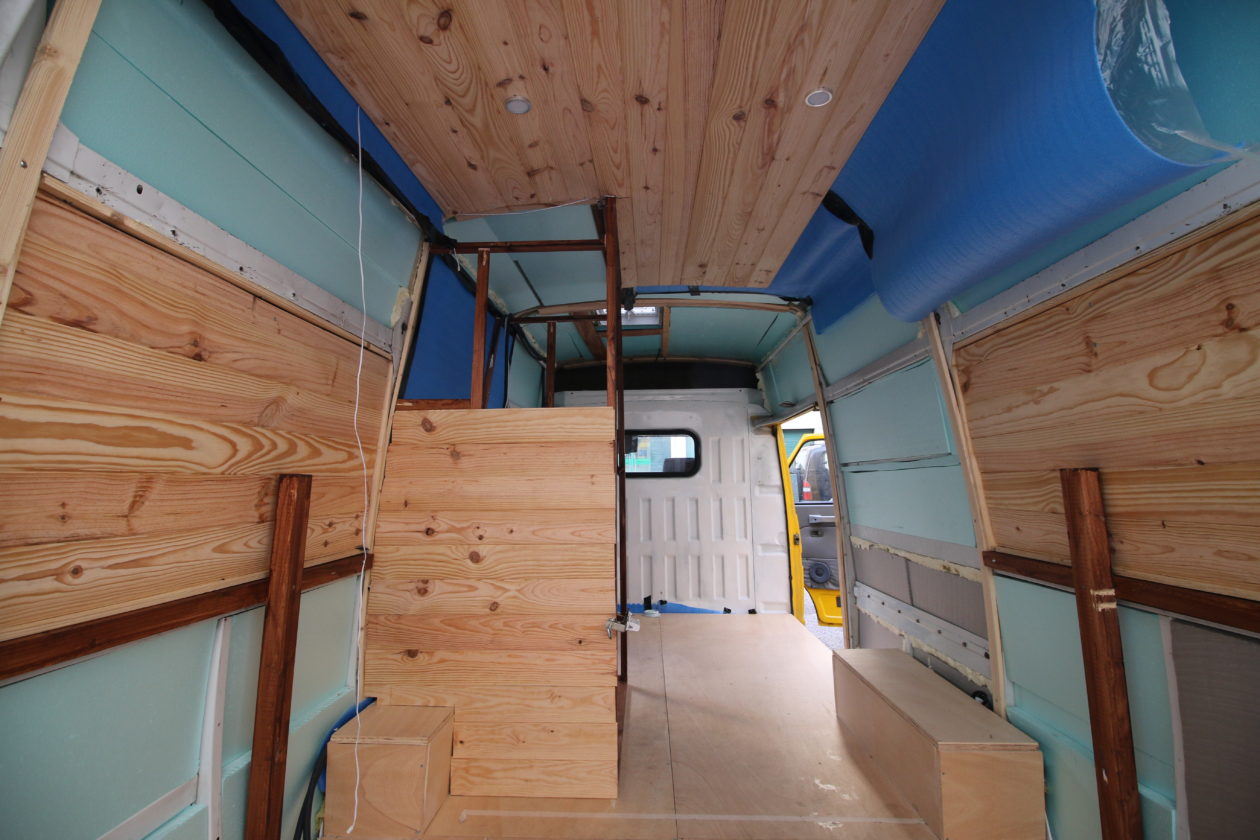
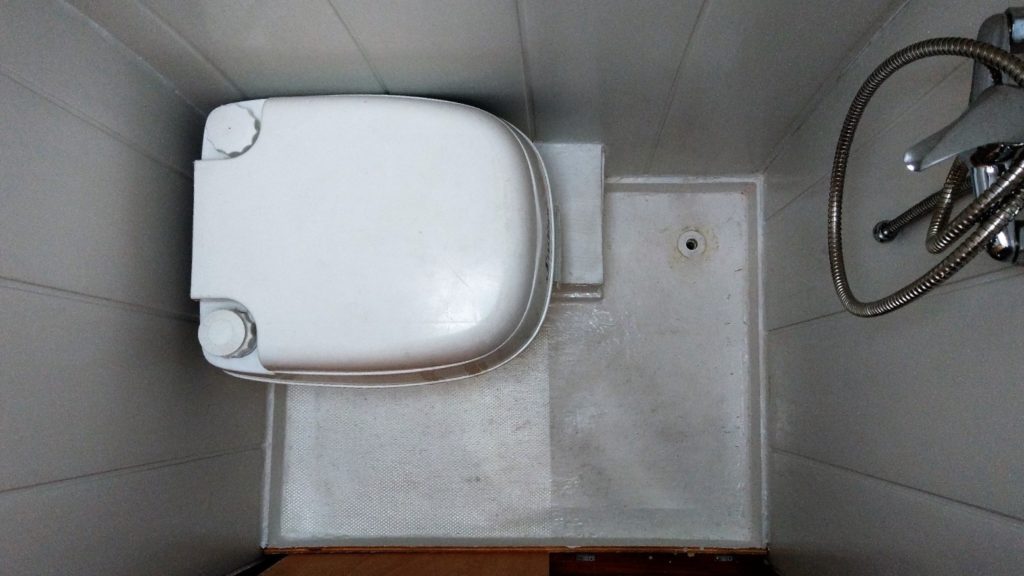
Before starting a conversion and if the size of the van allows it is necessary to think about whether or not we want to have a bathroom, since it will take up a lot of space in the interior and will add a lot more work because it is necessary to do the plumbing, to have a deposit of dirty water, plus it will almost certainly imply some kind of legalization / booklet change to avoid problems with authority.

If we think having a bathroom is indispensable?

No, for those who want to make a transformation to travel a few weeks / days from time to time, especially in summer and never getting too far from water, having a bathroom is not necessary, before we had the van finnished we traveled 2 weeks through Portugal and we did not use the bathroom or toilet once.

We traveled in the interior, stopping at many river beaches, and in almost all of them it is possible to find a shower / toilet / bathhouse.

On the other hand we also have an outdoor shower (use natural soap to not harm the environment) and we can always take a shower.

IMG_20180927_190625[1]

However, for a trip like the one we did in Europe for 9 months, the bathroom proved to be indispensable, since in most summer tourist sites the places we could use are closed, in big cities it is sometimes very complicated find bathroom

To this is added a logic question of comfort and hygiene, especially for women.

We decided to make a bathroom because it is so much more comfortable, our van is big enough for us to do and because we want to be able to really live in it independently.

The structure

Soon after making the floor, we made the structure of the bathroom, we used slats of 38x38mm and others of 32x32mm, this later proved to be a mistake because the fact that the slats are not all the same size things not 100 % certain, which later on the part of holding the wood paneling and the PVC makes things difficult.

The curves of the van also did not help but in the end we ended up having a solid structure.

lateral panels

After the structure we covered one of the sides with plywood (we could have done this at the end) and cut 3 panels of wood so that they fit inside the structure, for this we used plywood of 5mm of thickness, this wood will serve to paste the PVC panels later.

IMG_6249

The image is already in a more advanced phase, but you can see 2 of the panels. They did not fit perfectly but it is not necessary either, what is needed is for the PVC to fit.

To fix the plywood panels we had to fix support slats to the structure of the van. After we made the 3 sides, we made the skylight.

In the beginning we were only going to do a 12v ventilation on the ceiling, but then we were advised to make a skylight for several reasons, the main one being that the skylight illuminates the bathroom and does not have to make a window (if we want natural light), then it works equally well for the exit of the humidity of the baths.

In the end it turned out very well and with the white PVC it ​​got a very good natural light.

40228533_1809498399119642_3468826041647104_n

The skylight we did in camperslife gaspar when we made the windows, for those who want to do, you just need a steady hand and cut with the eletric saw, then is screwed and apply the silicone glue and veda.

We used the bottom of the wskylight to attach the top of the PVC. With the skylight made we moved to the sides, we used the wooden panels as molds to make the PVC parts.

Then we put the PVC to the wood panels so that they all sat on each other. The PVC comes in pieces of 2.4 meters by 37.5 centimeters, so we had to join 2, or 3 to have the exact width.

In the end we put silicone to join all the panels, and it was okay because after almost 2000 km and 3 months there are no cracks, no movements of the panels or anything relevant.

shower

We decided to use a shower similar to the one we use at house and then fit it to a 10mm hose, which was the one we used for the water passage. It was not too complicated but we had to buy two sets of pieces that would reduce the size of the water outlet.

We started by making a hole through the diameter of the shower outlet through PVC and wood.

Then we added the reductions to the shower, all with teflon. We had to scrape the wood a bit so the parts could be joined. In the end we screwed up a slat of wood on top so that they were fixed.

the floor

The floor was the most complicated part because the wheel outline is part of the floor, that is, instead of having a normal shape (rectangular type), it has a trapezoidal shape, which makes it impossible for us to use a shower base already made, which had made everything much simpler.

This part is the most important because it has to be completely waterproof so there is no water infiltration from what we left to the end while we decide what to do, in the end we chose to use anti-infiltration membrane that is usually used on the roofs.

IMG_20180822_180500

First of all, we put an anti-vapor barrier with the shape of the floor with a small fold upwards on the sides to serve as a protection for the floor of the van, then apply a wooden base to the area of ​​the floor. We treated the wood with maritime varnish

IMG_20180822_180750

We cut the sides , screwed to the PVC and the wood, finally united with silicone to the base of wood.

In the end we passs a simple sandpaper and applied the membrane with fiber, it is important to have fiber because it will allow it to adhere to the sides, otherwise it would drain.

We applied 3 layers in total and we were happy with the final result, although we need some use to see if everything is alright, something that has not happened so over time we will be updating the article with our feedback.

One thing is certain this system implies a maintenance, that is to say over the months / years (depends on the use) we have to go do another layer in some areas.

This was one of the solutions we found. Another would be to make a fiber base which well done offers stronger and longer protection. We decided not to come up with this idea because from what we’ve researched and some people told us, it’s complicated to do something really good without experienced . Another factor is that the materials to make this work we have seen for sale are quite expensive

With our tools and materials available we think that this was the best option and we were happy with the final result, however if in the future there are problems of infiltration we can always take what we have done and ask a professional of the area to make us a base in custom fiber, or even try ourselves this alternative.

To finish the floor, we had to make a hole to drain the water. Ideally the base should be a little tilted to the drain, something that did not happen because the way we made the base so did not allow it. But we had just done one in the corner and the water dont’st stay in the floor, you just need to drive or use one of those things to clean the windows and push the water.

the toilet

At first we had thought of making a kind of support for the toilet, which would sit on top of the wheel cellar, but then we ended up by simply using it directly on top of the wheel cellar and it has worked very well, we can not keep it on the ground when we walk.

We do not know yet if this is going to be the definitive solution but the reality is that it is easier to clean and there are no hidden sites that can accumulate water. If we change anything, we update the article.

the door

We decided to make a sliding door because if we did a normal one we would have to deal with some problems, one of them was that the door would hit the table so whenever we wanted to enter the bathroom we had to shrink the table, something that is not very nice.

We could also do a shrinking door, those accordion type, the point is that getting one with the dimensions we needed was very complicated and besides we think that visually does not look so good.

IMG_6693

The side part where the door is, has an always fixed part (left), which we wood paneling and has the door on the right side. The door pulls back from the wood paneling. To protect this wood we have applied sea varnish and we have a curtain that covers the part of the door, the wood and the toilet.

We bought a kit with a gutter and brackets that we applied at the top, below we put some things for the doors to be in the right place. The handle is on top because the door is tall, thin and narrow, and to slide the handle needs to be at this spot.

In the end it turned out surprisingly well, we just can not get too fat.

price of the materials

  • Slips 38×38 = 19 €
  • Slips 32×32 = 5 €
  • Plywood 2550x1220x5 = 18 €
  • Plywood Plate 1800x500x10 = 10 €
  • PVC = € 46
  • Glue for PVC = € 18
  • Sliding door kit = 15 €
  • White Silicone = 4 €
  • Sea Varnish = € 11
  • Membrane with fiber = 28.95 €
  • Poliban- 6 €
  • Shower with mixer and fag = 19 €


Total: € 200

Other articles about this conversion

Help us to travel more 🙂

Do you want to help keep the site up and contributing to our travel passion? Use one of the links below to make your reservations. For you there is no cost and we received a small commission. Thank you very much.

  • Reservation of accommodation through Booking —-> Click here !
  • Booking through Airbnb (30 € discount – new users) —-> Click here !
  • Buy tickets for monuments and experiences through the Get Your Guide —> Click here !

Other Articles

if you have any doubt, or if you want to say us anything, just leave a comment here or send us an email to worldonmyway@worldonmyway.com


Leave a Reply

Your email address will not be published. Required fields are marked *